You're convinced. Translation makes sense. The math checks out. Other creators are doing it and seeing results. But now comes the moment that stops most people: actually opening the tool and doing it. New software is intimidating. What if you mess something up? What if you break your channel? What if the translations are wrong and you can't undo them? These fears are normal. They're also unnecessary. VidLocalizer is built on YouTube's official API — the same infrastructure that major media companies use. Nothing you do in the tool can break your channel. Everything is reversible. And the entire process, from signup to 100+ languages live, takes about ten minutes. Let me walk you through every step.
Before You Start: What You Need
Four things. A YouTube channel with at least one video uploaded. A Google account linked to that channel. A web browser. Ten minutes of uninterrupted time. That's it. You don't need a powerful computer. You don't need to install anything. VidLocalizer runs entirely in your browser. The translations happen on YouTube's servers through the API. Your videos stay where they are. Nothing is downloaded or re-uploaded.
One important note: you need to be the channel owner or have manager-level access to the YouTube channel you're translating. If you're part of a Brand Account, make sure you're logged into the correct Google account before starting. Check by opening YouTube in another tab — if you can see the channel in your account switcher, you're good to go.
Step 1: Create Your VidLocalizer Account
Open your browser. Go to VidLocalizer. Click the signup button. Enter your email and create a password. That's it. No credit card required to start. No phone verification. No waiting for approval. Your account is active immediately.
Once you're logged in, you'll land on the main dashboard. It's clean. A navigation bar. A "Connect YouTube" button. A list of supported languages — all 100+. Spend thirty seconds looking around. Get comfortable with the layout. There's nothing complicated here. The tool does one thing and does it well.
Step 2: Connect Your YouTube Channel
This is the step that makes people nervous. It shouldn't. Click the "Connect YouTube Channel" button. You'll be redirected to Google's official OAuth page — the same secure login screen you see when connecting any trusted app to your Google account. Check the URL if you want. It's accounts.google.com. This is Google's domain, not VidLocalizer's.
Google will show you a permissions screen. It lists what VidLocalizer can access: manage your YouTube videos, update metadata, upload subtitles. This is exactly the access any translation tool needs. It doesn't give VidLocalizer your password. It doesn't let the tool delete videos. It doesn't let the tool change your channel settings. The permissions are scoped specifically to the functions required for translation.
Click "Allow." You'll be redirected back to VidLocalizer. Your channel name and subscriber count will appear on the dashboard. Connection complete. Total time: thirty seconds.
Step 3: Select Your Videos
After connecting, VidLocalizer pulls your video library through the YouTube API. You'll see a list of your uploads — thumbnails, titles, publish dates, view counts. The most recent videos appear first. You can scroll through your entire library or use the search bar to find specific videos.
Select the videos you want to translate. Check the box next to each one. Start with three to five videos for your first batch — this lets you learn the workflow and see results before committing your whole library. Pick videos with universal topics and decent retention. These have the best chance of performing well in new markets.
Pro tip: look for your "sleepers." Videos with above-average watch time but below-average views. The content quality is proven. The discoverability is the problem. Translation fixes exactly that.
Step 4: Choose Your Languages
Here's where VidLocalizer does the heavy lifting. The language selection screen shows all 100+ supported languages. They're organised alphabetically with checkboxes. At the top, there's a "Select All" option.
Use it. Select all 100+ languages. Yes, all of them. There's no penalty for having many subtitle tracks. YouTube doesn't punish channels for offering multiple language options. Each track is a separate asset for a separate audience. The algorithm figures out which markets respond. You don't need to predict it.
If you want to be selective, focus on the high-population YouTube markets: Portuguese for Brazil, Spanish for Latin America and Spain, Indonesian, Turkish, Hindi, Vietnamese, Arabic, French, German, Japanese, Korean, and Thai. These markets combine for over 1.5 billion YouTube users. But honestly? Select all. It takes the same amount of time.
Step 5: Generate and Review Translations
Click "Generate Translations." VidLocalizer processes your selected videos and languages. The time depends on how many videos you selected and their length. For three videos and 100 languages, expect about one to two minutes of processing time.
When generation is complete, you'll see a preview screen. Each video shows a sample of translations — usually the first few languages alphabetically. You can click through to see any language you want. Check a few. Look at the Portuguese title. The Indonesian description. The Turkish subtitles. The quality is high — these aren't garbled machine translations. They're coherent, grammatically correct, and localised for natural phrasing.
If you see something you don't like in a specific language, you can edit it. The tool provides an inline editor for manual adjustments. But for your first batch, don't overthink it. The translations are good. Push them live. You can refine later.
Step 6: Push to YouTube
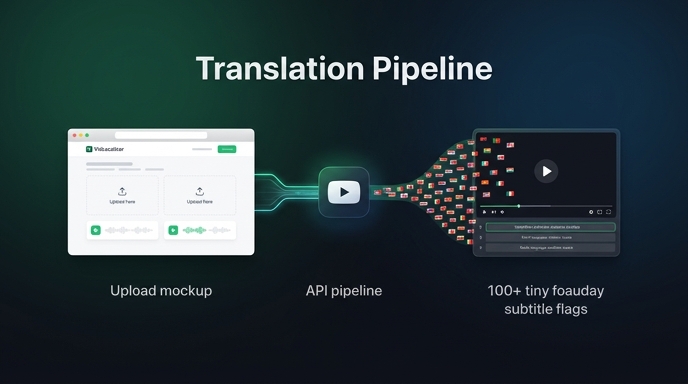
Click "Push to YouTube." This is the moment. VidLocalizer sends all translated metadata — titles, descriptions, and subtitle tracks — to YouTube's servers through the API. The upload happens in parallel for all languages. It's fast. A few seconds for the metadata. A minute or two for the subtitle tracks depending on video length.
You'll see a progress indicator. When it reaches 100%, the push is complete. VidLocalizer will show a success message confirming how many videos were updated and how many languages were pushed. Congratulations. Your content is now global.
Step 7: Verify in YouTube Studio
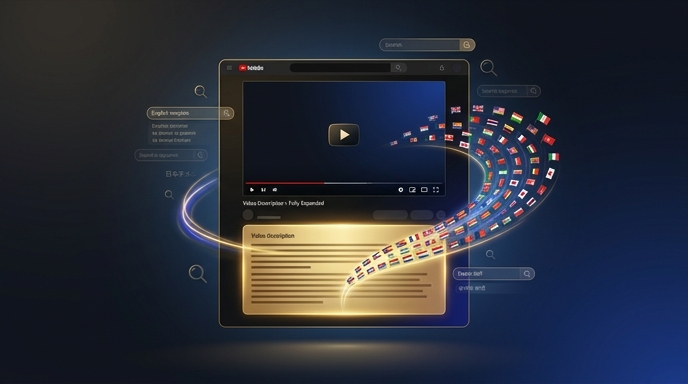
Open a new browser tab. Go to YouTube Studio. Find one of the videos you just translated. Click on it. Go to the "Subtitles" tab. You'll see a list of language tracks. A few days ago, this list had one language — probably Russian. Now it has 100+. Each track is tagged with the correct language code. Each one is accessible to viewers in that language.
Now go to the "Details" tab. YouTube shows your video title and description in your default language. But the translated versions exist in YouTube's metadata system. When a viewer in Brazil watches your video, they'll see the Portuguese title. When someone in Indonesia searches for your topic, they'll see the Indonesian title. The translations are live. They're working. They'll keep working for as long as your video exists on YouTube.
Step 8: Wait and Track
This is the hardest step because it requires inaction. Wait two to three weeks. The algorithm needs time to index the new metadata, test your content with new language audiences, and gather performance signals. Checking analytics daily will drive you crazy and won't speed up the process.
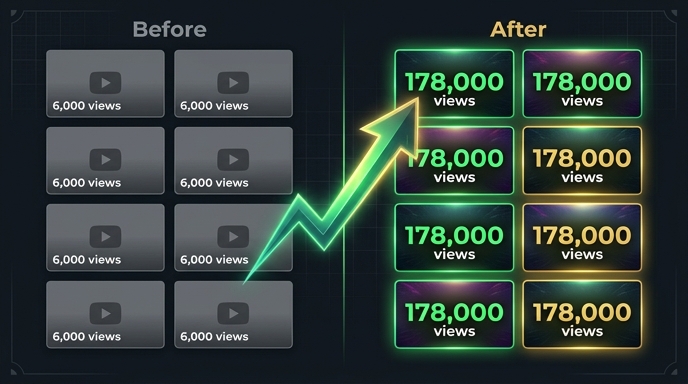
Set a calendar reminder for 21 days from now. When it fires, open YouTube Studio. Go to Analytics. Click the Geography tab. You'll see countries that weren't there before. Brazil. Indonesia. Turkey. Vietnam. India. The view counts might be small at first. That's normal. Global growth compounds. The views you see at week three will multiply by week six, then again by week twelve.
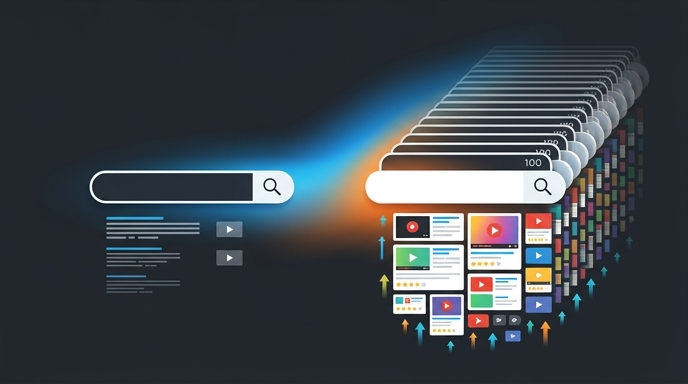
Also check the "Traffic Source" tab and filter by "YouTube Search." You'll see search terms in multiple languages. These are viewers finding your content through translated titles and descriptions. This is the multilingual SEO flywheel starting to spin.
What to Do After Your First Batch
Once you see results from your first batch, build the translation habit. Every new video you publish gets the same treatment. Upload in Russian as normal. Open VidLocalizer. Select the new video. Push 100+ translations. Done. Two extra minutes in your upload workflow. Global distribution from day one.
For your existing library, translate in batches. Do ten videos a week. In a couple of months, your entire back catalogue will be global. Old videos that were gathering dust will find new audiences in new languages. The ROI compounds with every batch.
You've just done what most creators never do. Your content is now visible to over four billion potential viewers. The tool is simple. The strategy works. The only missing piece was you taking action. Now you have.
Localize your YouTube channel today
3-day free trial · 80+ languages · cancel any time